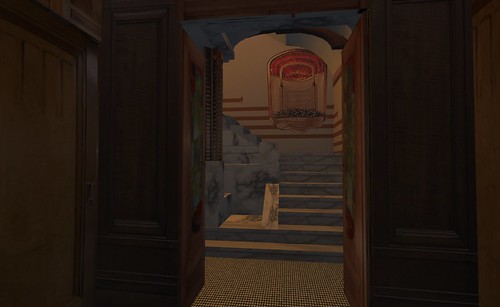
One common feature of late 19th Century middle class urban houses in Europe was the entrance staircase. In the usual manner of design, a kitchen and scullery occupied the streetside of the ground floor, the main reception rooms were therefore on the floor above the street level, the Bel Étage. Not one to conform, Horta took this "standard" and reinvented various aspects. Reorganising the groundfloor to give more space but also making the entry staircase a real feature piece. As one entered the building the double doors were swept open and the visitor was met with a stunning marble staircase lit from above by an ingenious light well, making it both light and welcoming, very different to the darkness often encountered inside the deep set terraced town houses.
It was always important to me to create that sense of welcome, the idea that you were entering something different. Though as in all my earlier attempts skills and tools both left me to make compromises.
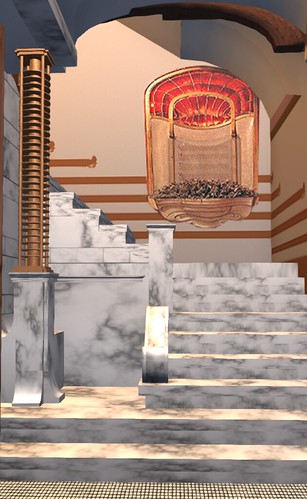
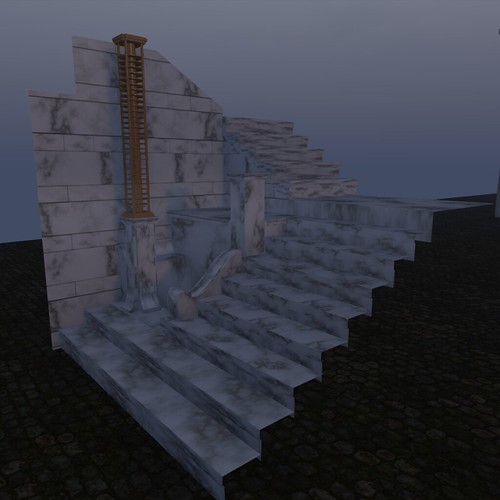
This is a photo of the first version of the stairwell. This predates sculpts and is fully prim built. The brass coloured column in the middle is my low prim attempt at recreating the lovely column radiator that Horta installed to take the chill off of the stone stairwell.
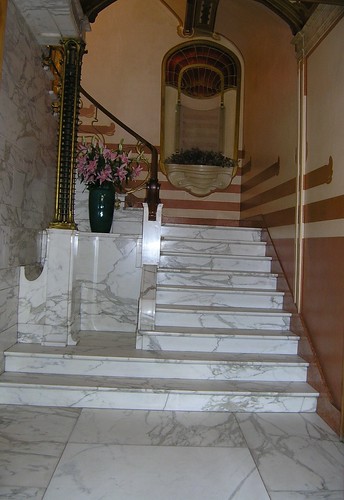
The photo above shows the real life Maison Horta and gives an idea of what I am trying to achieve.
This is how it has looked for the past 3 or 4 years, the only significant change since the 2007 version was to replace the prim built stairs with sculpted ones (a real saving back then!). There are some significant missing details not least of which is the curved marble detailing that forms the side of the staircase for the first few steps.
Today I rebuilt the stairwell using a combination of Mesh Studio and Blender. Blender was required for the curved marble that could not be produced from prims.
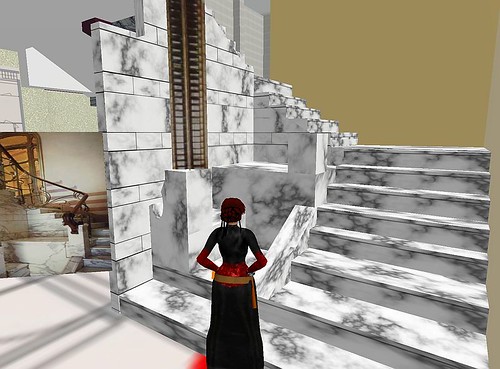
Here we have the 2012 version of the same stairwell. much closer in form to the original now with a proper mesh rendition of the radiator too and crucially, even with the separate meshes for the radiator and the curved marble, it still only incurs a land impact of 5 compared to around 15 for the previous version and closer to 25 for the original.
However the purpose of this blog was not simply to track progress but also talk about physics. There is a lot of confusion over physics in mesh and how to define it, but simply defining it isnot the end of the story either. By default once you import the physics is not actually enabled properly.
The default mesh physics is something akin to taking your object and stretching cling film over it. it will tend to stretch from one extremity to another and not follow the shape you have lovingly crafted. This is what is know as a convex hull. Any mesh when first imported whether you have defined a custom physics model or not appears to have its physics type set to convex hull.
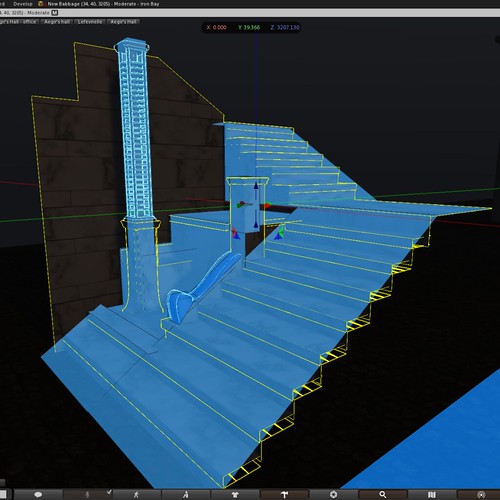
Here we have the finished stair well ready to be deployed. We can use the viewer to help us see what the physics looks like for any given object. Make sure you have the debug/develop menu enabled and then select "render metadata" and tick the "Physics Shapes" option.
In the image above I have told the object to use the convex hull physics. This is selectable from within the features tab of the build menu and is labelled "Physics Shape Type". By default you may see only two options, "convex hull" and "none". As you can see the convex hull drapes itself over the mesh and is far from useful. If you select none then the object effectively becomes phantom and you can use the old fahsioned trick of invisible prims. However, there is a better way.
The better way, is to build your own physics model. Don't worry it is not scary and all you do in fact is exactly what you might have down with a sculpted prim and invisible prims. Create a model that matches the physics you wish to define. the simpler the better as each face will add to the physics cost of the mesh upload and therefore influence your overall LI.
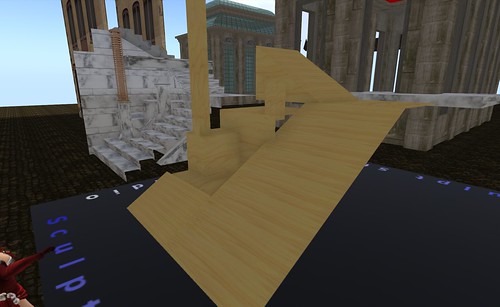
In the photo above I am working on such a model. Note that I am only defining the surface that I want to be "physical", so ramps for the stairs are that bare minimum. I have also chosen to go crazy and define some physical presence for the columns and other decorations. Everything that would never be reasonably expected to be touched by an avatar can be made invisible. Once you have made this model drop the Mesh Studio script into it, set the settings to the lowest level and make your mesh.
The physics mesh is applied at upload time and cannot be tweaked later, it is important (and I discovered this the hard way) to ensure that the bounding box of the physics matches the bounding box of the model. If there is any disparity when the model are overlaid they will no marry up properly.
Now let's look at the results of applying a custom physics mesh using the viewer tools again.
In order to see a custom physics mesh we have to tweak the physics type setting again as before. If your mesh has a custom physics mesh included then you should now have a third option available "prim". This may seem rather obscure and I would agree, however selecting "prim" as the physics type, enables the physics map defined in the mesh model. As you can see the physics mesh perfectly matches the model I made and has been overlayed on top of the visual mesh. The result is nice sloping stair ramps and a few extra details.
Hooray.
I hope this helps a little, to explain the peculiarities of mesh physics.
Be careful mesh can be slippery at times.


No comments:
Post a Comment